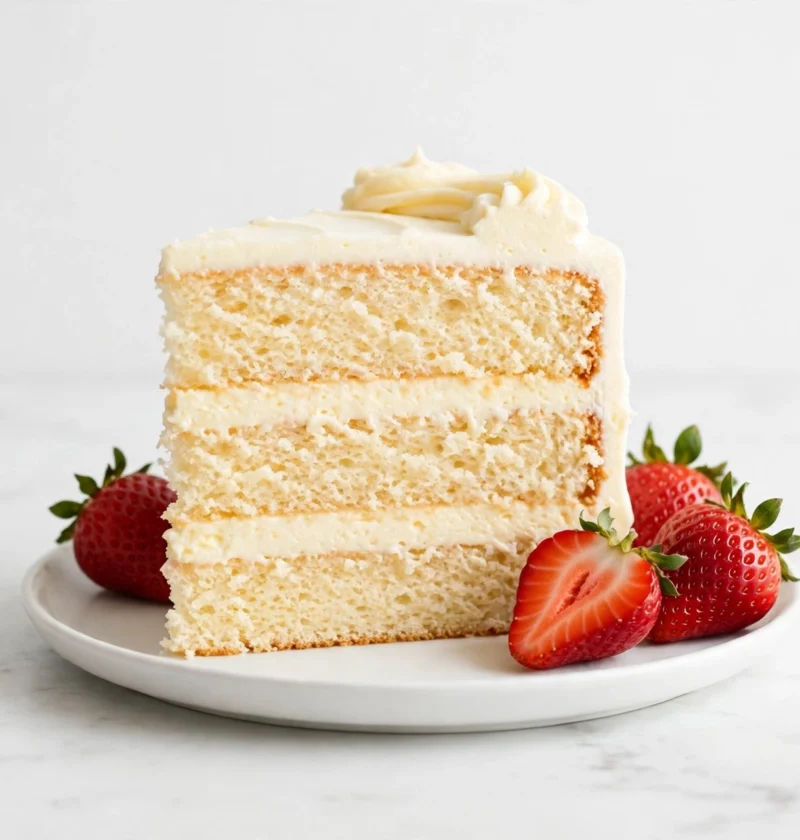
In my opinion, the beauty of this cake comes from its simplicity. You do not need chocolate chips, colourful decorations or complicated fillings to enjoy it. A properly baked vanilla sponge can stand proudly on its own. Its soft, fluffy texture, delicate golden colour and sweet vanilla aroma make it a favourite for birthdays, afternoon tea, family gatherings and those days when you simply want something homemade. The best part? You do not need fancy ingredients or professional baking skills to make one.
I love recipes that bring simple ingredients together to create something memorable. A good vanilla sponge cake does exactly that. It uses everyday baking ingredients, follows a straightforward method and gives you a light, tender cake that tastes wonderful on its own or with your favourite frosting.
If you have ever wanted to bake a beautiful homemade cake but worried about ending up with a dry, heavy or flat result, this recipe is worth exploring. I will walk you through everything, from understanding what makes a classic vanilla sponge cake special to choosing the right ingredients, preparing your cake batter, baking it properly and serving it with delicious toppings.
Get your mixing bowl ready because this is one homemade cake you’ll truly love.
What Is a Classic Vanilla Sponge Cake?
A classic vanilla sponge cake is a light, soft and airy cake made with basic baking ingredients such as flour, sugar, eggs, butter, milk and vanilla extract. Its main feature is its delicate sponge-like texture, which gives the cake a soft bite without making it too heavy.
The word “sponge” describes the cake’s light structure. Air trapped inside the batter expands during baking, helping the cake rise and develop its soft texture. Eggs play an important role because they help hold the structure together while adding moisture and richness.
Vanilla gives the cake its familiar sweet aroma and gentle flavour. It does not overpower the other ingredients. Instead, it brings everything together and creates a balanced taste that works with many fillings and toppings.
A classic vanilla sponge cake is also one of the most useful basic cake recipes to learn. You can serve it plain, dust it with icing sugar, cover it with buttercream or add fresh fruit and whipped cream.
You can also use it as the base for a layered birthday cake, a celebration cake or a simple weekend dessert.
A classic vanilla sponge cake has a special way of making an ordinary day feel like a celebration.
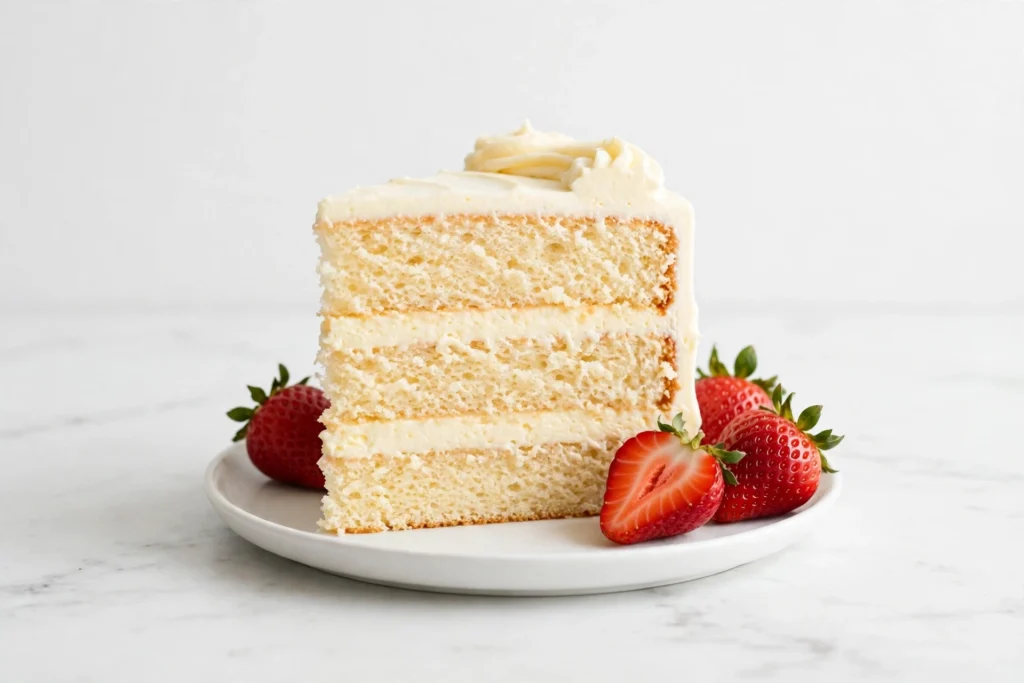
Why You’ll Truly Love This Classic Vanilla Sponge Cake Recipe
There are plenty of cake recipes to explore, but a classic vanilla sponge deserves a place in your kitchen. It offers a lovely combination of flavour, texture and simplicity.
First, the ingredients are easy to find. You probably have several of them in your kitchen already. You do not need expensive baking products or special equipment to get started.
Second, the recipe is suitable for beginners. You can follow each step at your own pace, and I will explain why each stage matters. Once you understand how the ingredients work together, baking becomes much easier.
Another reason to love this recipe is its versatility. You can enjoy the cake without frosting, add a layer of jam, spread vanilla buttercream over the top or decorate it with strawberries.
It also works well for different occasions. You can bake it for a birthday, serve it after Sunday lunch or prepare it when you have guests coming over.
The flavour is another highlight. Real vanilla extract gives the cake a warm, sweet taste that feels comforting without being too strong.
Most importantly, this recipe focuses on a soft and tender crumb. Nobody wants to cut into a beautiful cake only to discover that it feels like a kitchen sponge that has spent too much time in the cupboard!
Classic Vanilla Sponge Cake Recipe at a Glance
Preparation time: 20 minutes
Baking time: 25–35 minutes
Cooling time: 45–60 minutes
Total time: Approximately 1 hour and 45 minutes
Servings: 10–12 slices
Difficulty: Easy
Cake size: Two 8-inch round cake layers
Oven temperature: 180°C conventional oven or 160°C fan oven (350°F)
Main flavour: Sweet vanilla
Texture: Soft, fluffy and tender
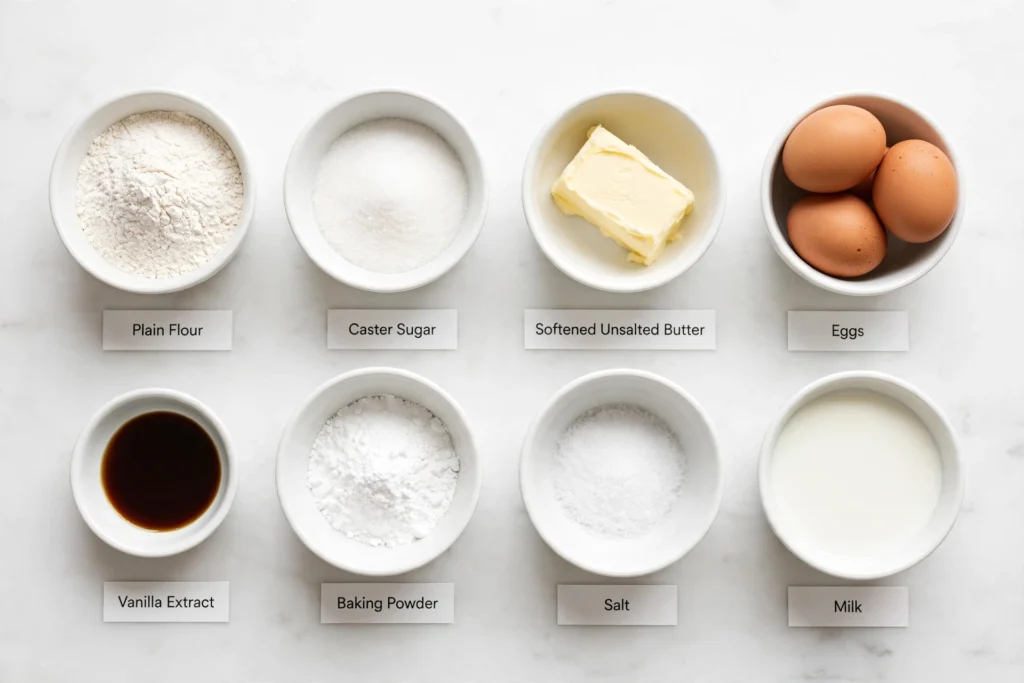
Ingredients You Need for Classic Vanilla Sponge Cake
The ingredients in this recipe are simple, but each one has a specific job. Using the correct quantities and preparing them properly can make a noticeable difference to your finished cake.
250g (2 cups) plain flour: Plain flour provides the structure for the sponge cake. It helps the cake hold its shape while keeping the crumb tender. Measure it carefully because too much flour can make your cake dry or dense.
250g (1¼ cups) caster sugar: Caster sugar adds sweetness and helps create a soft cake texture. Its fine grains dissolve more easily into the butter during mixing.
250g (1 cup plus 2 tablespoons) unsalted butter: Butter adds flavour, moisture and richness. Use softened butter rather than melted butter. Softened butter should feel slightly cool and give gently when pressed with your finger.
4 large eggs: Eggs bind the ingredients together and help the cake rise. They also contribute to the cake’s colour, moisture and structure. Room-temperature eggs are easier to incorporate into the batter.
2 teaspoons vanilla extract: Vanilla extract provides the main flavour. Use a good-quality extract for a pleasant aroma and balanced sweetness.
2 teaspoons baking powder: Baking powder helps the sponge rise and gives it a lighter texture.
¼ teaspoon salt: Salt balances the sweetness and brings out the vanilla and butter flavours.
3–4 tablespoons milk: Milk helps adjust the consistency of the batter and adds moisture. Use whole milk for a richer result.
Optional icing sugar: Use this to dust the cooled cake before serving.
These quantities provide a traditional butter-based vanilla sponge with a soft crumb and a pleasant buttery flavour.
Equipment You Need Before Baking
You do not need a professional bakery kitchen to make this cake. A few basic tools will help you prepare the batter and bake it evenly.
You will need two 8-inch round cake tins, a large mixing bowl, an electric hand mixer or stand mixer, a kitchen scale, measuring spoons, a sieve, a spatula, baking parchment and a cooling rack.
An oven thermometer is also useful if your oven does not heat evenly. Some ovens run hotter or cooler than the temperature displayed on the control panel.
I recommend preparing all your equipment before mixing the ingredients. It saves time and prevents you from searching for baking parchment while your butter and sugar are already sitting in the mixing bowl.
How to Make Classic Vanilla Sponge Cake Step by Step
The process is simple when you follow the correct order. Take your time with the mixing stages because they help create the cake’s final texture.
Step 1: Prepare Your Oven and Cake Tins
Preheat your oven to 180°C (350°F) for a conventional oven or 160°C for a fan-assisted oven.
Grease two 8-inch round cake tins with a little butter. Line the bottoms with baking parchment to prevent the cakes from sticking.
You can also lightly grease the sides of the tins and dust them with a little flour if you prefer.
Place your prepared tins on a flat surface while you make the batter.
Step 2: Prepare the Dry Ingredients
Place the plain flour, baking powder and salt in a mixing bowl.
Sift the ingredients together to remove lumps and distribute the baking powder evenly through the flour.
This step helps create a more consistent cake batter. It also prevents small pockets of flour from appearing in the finished sponge.
Set the dry ingredients aside.
Step 3: Cream the Butter and Sugar
Place the softened butter and caster sugar in a large mixing bowl.
Use an electric mixer to beat them together for approximately 3–5 minutes. The mixture should become pale, creamy and noticeably lighter.
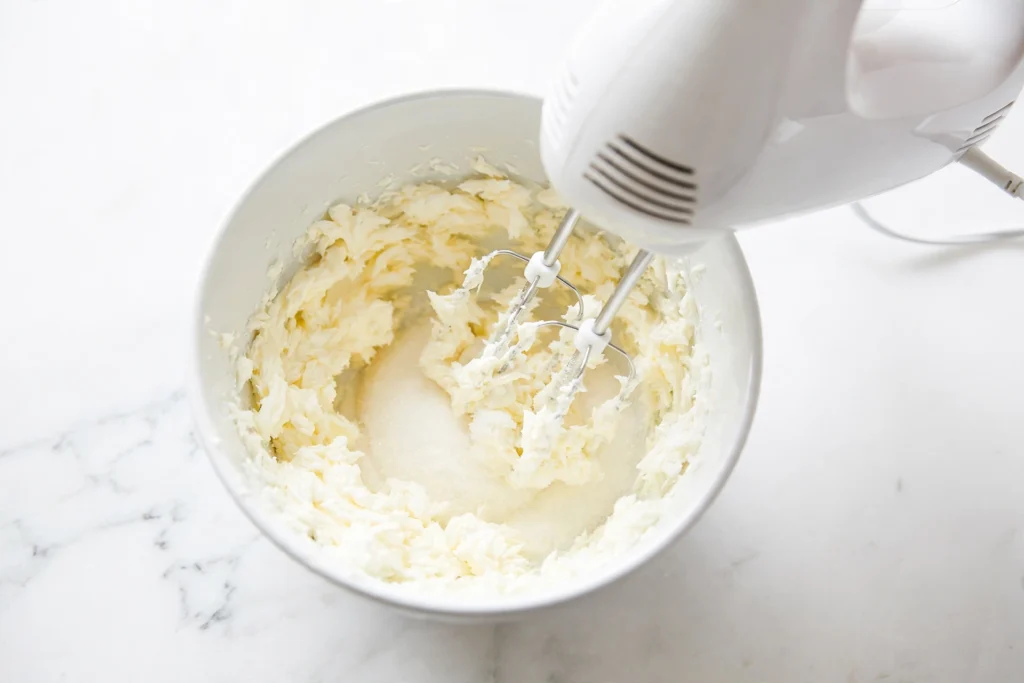
This process is called creaming. It helps incorporate tiny air bubbles into the butter and sugar. These bubbles expand during baking and contribute to a lighter cake.
Avoid rushing this stage. If you mix the ingredients for only a few seconds, you may not incorporate enough air.
However, you do not need to keep mixing endlessly. Stop when the mixture looks fluffy and well combined.
Step 4: Add the Eggs Gradually
Crack the eggs into a separate bowl.
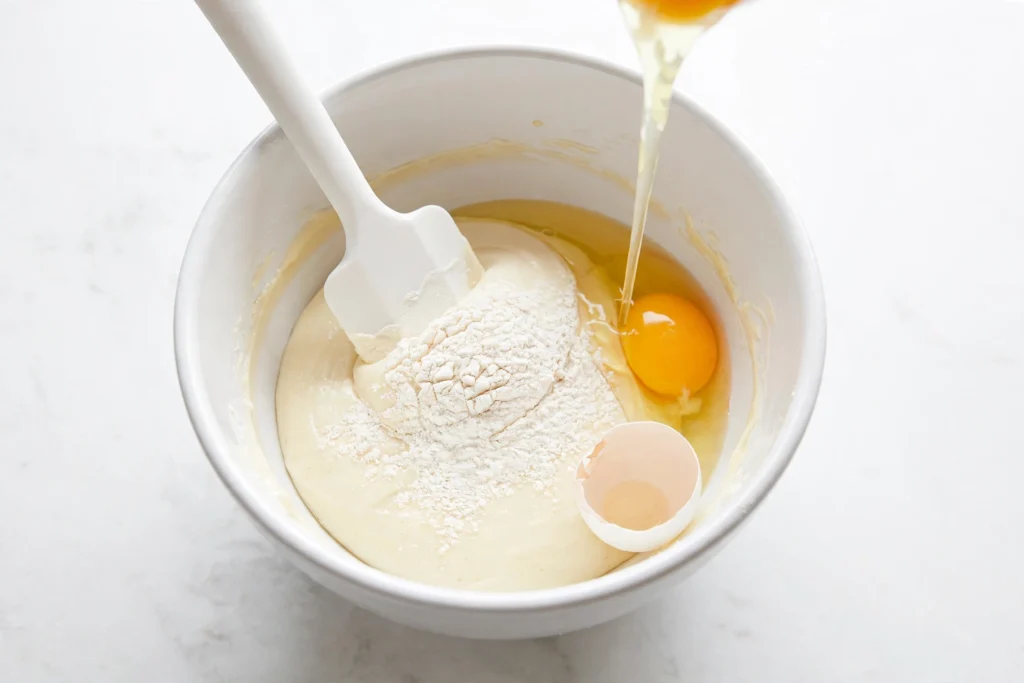
Add them to the butter and sugar mixture one at a time, beating after each addition.
Adding the eggs gradually helps them blend into the butter mixture more smoothly.
If the mixture begins to look slightly curdled, add one tablespoon of your measured flour and continue mixing gently.
Do not panic if the batter looks a little different at this stage. The flour will help bring the mixture together.
Step 5: Add the Vanilla Extract
Pour the vanilla extract into the mixture.
Mix briefly until the vanilla is evenly distributed.
You should notice a pleasant sweet aroma developing. This is one of my favourite parts of preparing a vanilla cake because the kitchen starts to smell like something wonderful is about to happen.
Step 6: Fold in the Flour
Add the sifted flour mixture gradually.
Use a spatula or a mixer on its lowest setting to combine the ingredients. If you use a spatula, fold gently from the bottom of the bowl towards the centre.
Avoid vigorous mixing.
Overmixing can develop the gluten in the flour and make the cake heavier than you want.
Continue until most of the flour disappears into the mixture.
Step 7: Add the Milk
Add three tablespoons of milk and mix gently.
Check the consistency of the batter. It should be smooth, thick and easy to spoon into the cake tins.
If it feels too stiff, add the remaining tablespoon of milk.
Avoid adding too much milk because an overly thin batter can affect the cake’s structure.
Step 8: Divide the Batter Between the Tins
Divide the cake batter evenly between your two prepared tins.
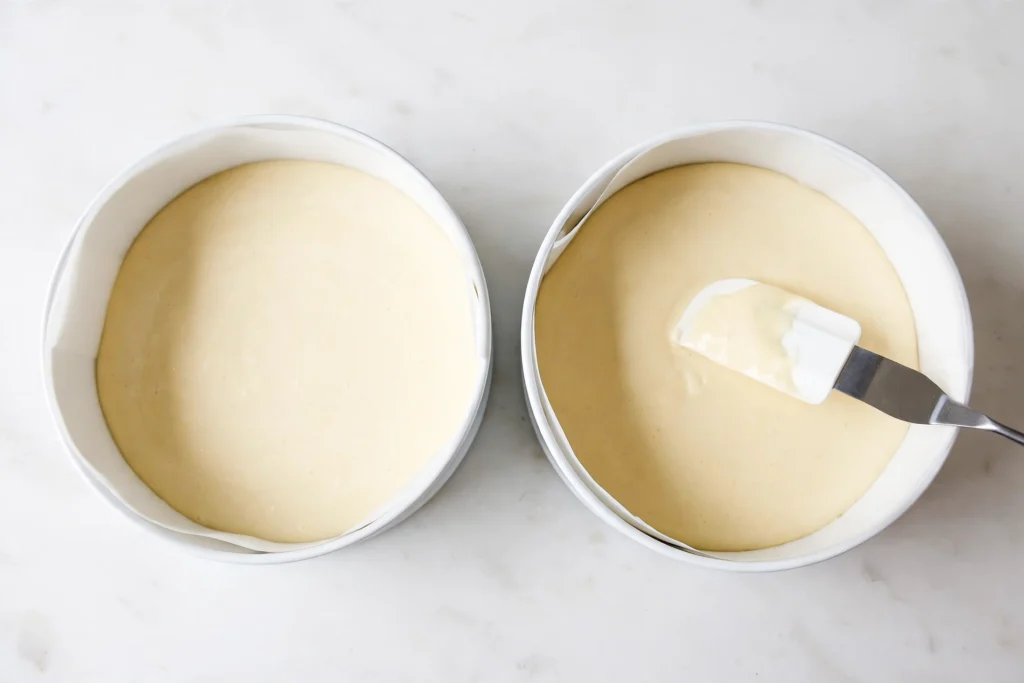
Use a spatula to scrape the bowl so that you do not leave half the mixture behind. Every spoonful counts!
Spread the batter gently and level the surface.
Tap each tin lightly on the kitchen counter to release any large air pockets.
Step 9: Bake the Sponge Cakes
Place the tins on the middle shelf of your preheated oven.
Bake for approximately 25–35 minutes.
The exact baking time depends on your oven, so begin checking the cakes after 25 minutes.
Avoid opening the oven door too early. A sudden temperature change can affect how the cakes rise.
The sponge cakes should develop a light golden colour. Their centres should feel springy when touched gently.
Insert a clean toothpick or skewer into the centre of each cake. If it comes out clean or with a few dry crumbs, the cake is ready.
If wet batter sticks to the skewer, give the cakes another few minutes.
Step 10: Cool the Cakes Properly
Remove the tins from the oven and place them on a cooling rack.
Allow the cakes to cool in their tins for approximately 10 minutes.
Run a thin knife around the edges if needed, then carefully turn the cakes out onto the rack.
Remove the baking parchment and allow the cakes to cool completely.
Do not add buttercream or whipped cream while the sponge is still warm. The topping may melt, slide off or turn into a sweet puddle.
Patience is important here, even if the smell makes you want to cut a slice immediately.
How to Know When Your Vanilla Sponge Cake Is Perfectly Baked
A good sponge cake should have a light golden surface and a soft, springy centre.
When you press the top gently with your fingertip, it should rise back rather than remain deeply indented.
The edges should look set and may pull slightly away from the sides of the tin.
A toothpick inserted into the middle should come out clean or with a few crumbs.
You should also notice a pleasant vanilla and buttery smell.
Do not rely on colour alone. A cake can look beautifully golden on the outside while remaining underbaked in the centre.
The toothpick test, springy texture and baking time together give you a better indication that your cake is ready.
The Secret to Making a Soft and Fluffy Vanilla Sponge
A fluffy sponge cake does not happen by accident. Several small details work together to create its light texture.
One of the most important steps is using room-temperature ingredients.
Cold eggs can make the butter mixture separate, while cold butter can make creaming difficult. Allow the butter and eggs to sit out for a short time before baking.
You should also cream the butter and sugar properly. This process introduces air into the mixture and helps the cake develop a lighter crumb.
Another important tip is to measure your flour accurately. Too much flour can absorb excess moisture and leave the sponge dry.
I also recommend folding the flour gently into the batter. Once the dry ingredients are incorporated, stop mixing.
Finally, make sure your baking powder is fresh. Baking powder loses strength over time, which can prevent your cake from rising properly.
These small steps can make a big difference to your final result.
Common Mistakes to Avoid When Making Vanilla Sponge Cake
Even a simple cake recipe can go wrong if you overlook a few important details.
One common mistake is using melted butter instead of softened butter. Melted butter changes the creaming process and can affect the cake’s texture.
Another mistake is adding all the eggs at once. This can cause the mixture to separate, especially if the ingredients are cold.
Overmixing is another problem. Once you add the flour, mix only until the ingredients are combined.
You should also avoid using too much flour. If you do not have a kitchen scale, spoon the flour into your measuring cup and level the top rather than packing it down.
Opening the oven door too early can cause the cake to lose some of its rise. Give the sponge enough time to set before checking it.
Using the wrong cake tin size can also change the baking time. A smaller tin creates a deeper cake that may need longer in the oven.
Finally, never frost a warm sponge. Allow it to cool completely before adding your chosen topping.
How to Decorate Your Classic Vanilla Sponge Cake
One of the best things about this recipe is that you can decorate it in several ways.
You can keep the decoration simple or create a beautiful cake for a special occasion.
A light dusting of icing sugar gives the sponge a traditional homemade appearance. It is a lovely choice when you want to enjoy the natural vanilla flavour without adding too much sweetness.
Vanilla buttercream is another excellent option. Spread a generous layer between the two sponge cakes and cover the top with a smooth coating.
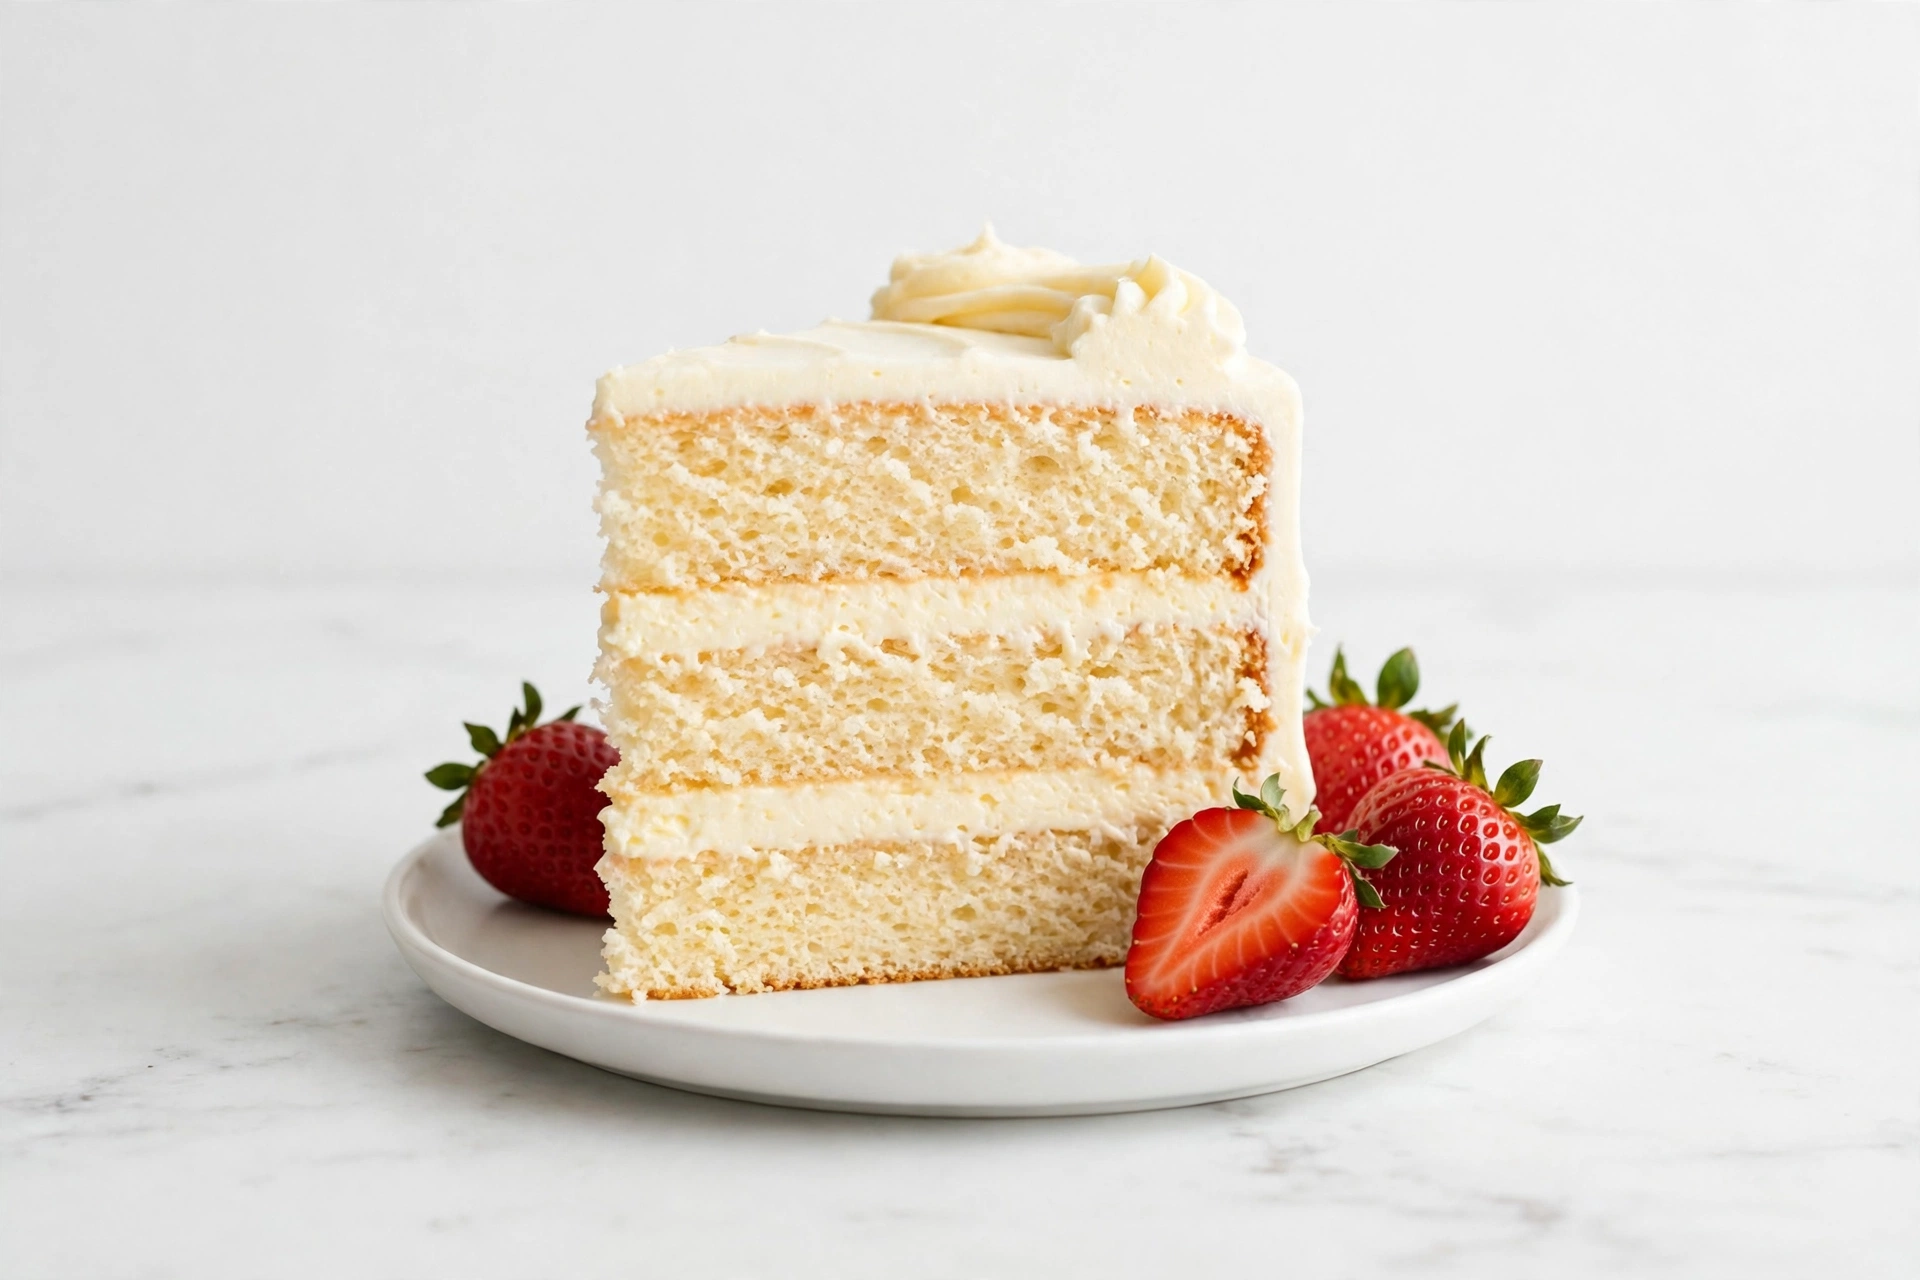
Fresh strawberries, raspberries and blueberries also make lovely toppings. Their natural sweetness and slight tartness balance the buttery sponge.
If you enjoy a traditional afternoon tea cake, spread strawberry jam between the layers and add a little whipped cream.
You can also decorate the cake with white chocolate curls, toasted coconut or finely chopped nuts.
For birthdays, add colourful sprinkles, piped buttercream or simple chocolate decorations.
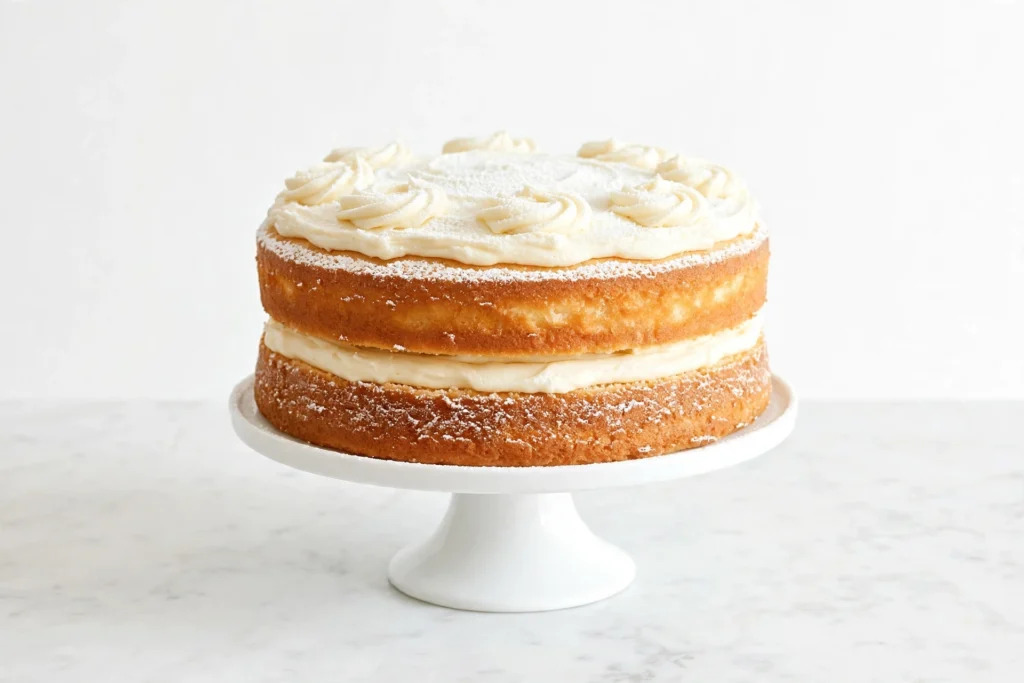
I personally prefer decorations that complement the flavour instead of covering it completely. A good vanilla sponge deserves a chance to shine.
Easy Vanilla Buttercream for Your Sponge Cake
If you want to turn your plain sponge into a celebration cake, vanilla buttercream is an excellent choice.
You will need:
- 150g softened unsalted butter
- 300g icing sugar, sifted
- 1 teaspoon vanilla extract
- 1–2 tablespoons milk
Place the softened butter in a mixing bowl and beat until smooth and creamy.
Add the icing sugar gradually, mixing on a low speed to prevent a cloud of sugar from covering your kitchen.
Add the vanilla extract and one tablespoon of milk.
Beat until the buttercream becomes light and fluffy.
If the mixture feels too thick, add a little more milk. If it feels too soft, add extra sifted icing sugar.
Spread the buttercream over one cooled sponge layer, place the second layer on top and cover the top with the remaining buttercream.
You can leave the sides uncovered for a simple homemade appearance or cover the entire cake for a more traditional celebration finish.
Delicious Filling Ideas for Classic Vanilla Sponge Cake
A vanilla sponge works with many different fillings. You can choose something simple or combine two flavours to create a more interesting dessert.
Strawberry jam: This is a traditional filling that adds sweetness and a fruity flavour. Spread a thin layer between the sponge cakes before adding buttercream or whipped cream.
Fresh whipped cream: Whipped cream gives the cake a soft, light filling. It works especially well with fresh berries.
Lemon curd: If you enjoy a little sharpness, lemon curd provides a refreshing contrast to the sweet vanilla sponge.
Raspberry filling: Raspberry jam or fresh raspberry compote adds a pleasant fruity taste.
Chocolate ganache: A thin layer of chocolate ganache creates a richer dessert while allowing the vanilla flavour to remain noticeable.
Caramel sauce: A small amount of caramel adds a buttery sweetness. Avoid using too much because it can make the layers slippery.
Vanilla custard: Thick, chilled vanilla custard makes a delicious filling for a traditional-style cake.
You can also combine strawberry jam with whipped cream for a simple afternoon tea cake that looks beautiful when sliced.
Can You Make Classic Vanilla Sponge Cake Without an Electric Mixer?
Yes, you can prepare this cake without an electric mixer.
A hand whisk and a little extra effort will help you combine the ingredients.
Start by making sure your butter is properly softened. Place it in a large bowl and beat it with a wooden spoon until creamy.
Add the caster sugar and continue mixing until the mixture looks lighter.
Add the eggs gradually, beating well after each addition.
Once you add the flour, use a spatula or wooden spoon to combine the ingredients gently.
The process may take longer than using an electric mixer, but it is still possible.
The main challenge is incorporating enough air during the creaming stage. Take your time and avoid using cold, hard butter.
How to Make Your Vanilla Sponge Cake Extra Moist
A soft sponge should feel tender without becoming wet or heavy.
To achieve this, start by measuring your ingredients accurately.
Butter and eggs contribute moisture, while milk helps create a smooth batter.
Avoid baking the cake for longer than necessary. An overbaked sponge loses moisture and becomes dry.
Check the cake near the end of the recommended baking time and remove it once it passes the doneness tests.
You can also brush the cooled sponge lightly with simple syrup if you want additional moisture.
To make simple syrup, combine equal quantities of sugar and water in a small saucepan. Heat until the sugar dissolves, then allow the mixture to cool.
Brush a small amount over each sponge layer before adding your filling.
Do not soak the cake. A light coating is enough to improve moisture without making the sponge soggy.
How to Store Classic Vanilla Sponge Cake
Proper storage helps your cake stay fresh and maintain its texture.
If your sponge cake has no perishable filling or frosting, allow it to cool completely before placing it in an airtight container.
Store it at room temperature in a cool, dry place for approximately 2–3 days.
If your kitchen is very warm, refrigeration may be necessary. However, refrigeration can make an uncovered sponge feel firmer and drier.
For a cake covered with whipped cream, fresh fruit or other perishable fillings, store it in the refrigerator.
Keep the cake in an airtight container to prevent it from absorbing other food smells.
Before serving a refrigerated butter-based sponge, allow it to sit at room temperature for approximately 20–30 minutes so the texture can soften.
Can You Freeze Vanilla Sponge Cake?
Yes, vanilla sponge cake freezes well when you prepare it properly.
Allow the baked sponge layers to cool completely.
Wrap each layer tightly in plastic food wrap, then add a second layer of aluminium foil or place the wrapped cake in a freezer-safe container.
Label the container with the date so you know when you prepared it.
For the best quality, use the frozen sponge within approximately 2–3 months.
When you want to serve the cake, remove it from the freezer and allow it to thaw while still wrapped.
Once completely thawed, unwrap the sponge and add your favourite filling or decoration.
Freezing individual layers is especially useful if you want to prepare a celebration cake in advance.
Can You Make Vanilla Sponge Cake Ahead of Time?
Yes. Preparing your sponge cake ahead of time can make baking much easier, especially if you are planning a birthday or family celebration.
You can bake the sponge layers one day before decorating.
Allow them to cool completely, wrap them securely and store them in an airtight container.
You can also prepare your buttercream in advance and refrigerate it in a covered container.
Before decorating, allow refrigerated buttercream to soften slightly and beat it again until smooth.
I recommend assembling the cake closer to serving time if you are using fresh whipped cream or fruit.
This helps maintain the best texture and appearance.
How to Serve Classic Vanilla Sponge Cake
A classic vanilla sponge cake tastes wonderful in several ways.
For a simple dessert, cut a slice and serve it with a cup of tea or coffee.
You can add fresh strawberries and a spoonful of whipped cream for a refreshing afternoon treat.
If you want something richer, serve the sponge with vanilla ice cream and a drizzle of warm chocolate sauce.
A little lemon curd on the side also works beautifully because its citrus flavour balances the sweetness of the cake.
For a family gathering, place the cake on a serving stand and decorate it with fresh berries.
You can also serve smaller slices after lunch or dinner.
One thing I love about this cake is that it does not need a special occasion. A quiet afternoon is a perfectly good reason to bake one.
Fun Variations of the Classic Vanilla Sponge Cake
Once you have mastered the basic recipe, you can experiment with different flavours and ingredients.
Lemon Vanilla Sponge Cake
Add the finely grated zest of one lemon to the butter and sugar mixture. The lemon adds a fresh citrus aroma without taking away from the vanilla flavour.
Strawberry Vanilla Sponge Cake
Add a layer of strawberry jam and fresh sliced strawberries between the sponge layers. Finish with whipped cream or vanilla buttercream.
Chocolate Chip Vanilla Sponge Cake
Fold approximately 75g of chocolate chips into the finished batter before dividing it between the tins.
Tossing the chocolate chips in a small amount of flour before adding them may help reduce sinking, although it does not guarantee that they will stay evenly distributed.
Almond Vanilla Sponge Cake
Add a small amount of almond extract alongside the vanilla. Use it sparingly because almond extract has a strong flavour.
Coconut Vanilla Sponge Cake
Replace one tablespoon of flour with one tablespoon of desiccated coconut. You can also sprinkle toasted coconut over the finished cake.
Birthday Vanilla Sponge Cake
Bake the cake in two layers, fill it with buttercream and decorate it with colourful sprinkles. Add a simple piped border around the top for a traditional birthday appearance.
Orange Vanilla Sponge Cake
Add finely grated orange zest to the batter. Orange and vanilla create a pleasant combination that works especially well with a light cream filling.
Is Classic Vanilla Sponge Cake Suitable for Beginners?
Yes. This is one of the cake recipes I would recommend learning before trying more advanced baking projects.
The ingredients are easy to find, the preparation steps are straightforward and the recipe does not require complicated decorating skills.
You also have plenty of room to practise.
Your first cake might not have perfectly even layers or a professional finish, and that is completely fine. Baking improves with practice.
Focus on measuring accurately, creaming the butter and sugar properly, adding the eggs gradually and avoiding overmixing.
Once you understand these steps, you will have a useful foundation for making other cakes.
Frequently Asked Questions About Classic Vanilla Sponge Cake
Why did my vanilla sponge cake not rise?
Your cake may not have risen because the baking powder was old, the batter was overmixed or the oven temperature was too low. Poor creaming can also reduce the amount of air in the mixture. Check your baking powder and make sure your oven reaches the correct temperature.
Why is my sponge cake dense?
A dense sponge can result from too much flour, insufficient creaming or excessive mixing after adding the flour. Measure your ingredients carefully and fold the dry ingredients into the batter gently.
Can I use self-raising flour instead of plain flour?
Yes, but you need to adjust the baking powder. Self-raising flour already contains a raising agent, so you should not automatically add the full amount of baking powder in this recipe. Follow the flour manufacturer’s guidance and avoid adding too much raising agent.
Can I use vegetable oil instead of butter?
You can make an oil-based vanilla sponge, but the texture and flavour will differ. Oil creates a moist cake, while butter provides a richer flavour and supports the creaming method used in this recipe.
Can I use vanilla essence instead of vanilla extract?
Yes. Vanilla essence can provide a vanilla flavour, although the strength and quality vary between brands. Use the quantity recommended by the manufacturer and adjust according to taste.
Why did my cake sink in the middle?
The cake may have sunk because it was underbaked, the oven door opened too early or the batter contained too much raising agent. Make sure the centre is fully baked before removing the cake from the oven.
Can I bake this recipe in one large tin?
Yes, but the baking time will change. A deeper cake needs more time to bake through. Check the centre with a skewer and avoid removing it while wet batter remains.
How do I stop my cake from sticking to the tin?
Grease the tin properly and line the base with baking parchment. Allow the cake to cool for approximately 10 minutes before removing it.
Can I make this recipe with a stand mixer?
Yes. A stand mixer works very well for creaming the butter and sugar and incorporating the eggs. Use a low speed when adding the flour to avoid overmixing.
How many slices does this recipe make?
Two 8-inch sponge layers typically provide approximately 10–12 servings, depending on the size of each slice.
Can I make this cake without milk?
Yes, you can use a suitable unsweetened plant-based milk as a replacement. The flavour and texture may vary slightly.
Can I add food colouring to the batter?
Yes. Add a small amount of food colouring after mixing in the vanilla. Gel food colouring is often useful because it adds colour without introducing much additional liquid.
Helpful Baking Tips to Remember
Before you start baking, keep these simple tips in mind.
- Bring your butter and eggs to room temperature before mixing.
- Measure the flour and sugar accurately.
- Use softened butter rather than melted butter.
- Cream the butter and sugar until pale and fluffy.
- Add the eggs one at a time.
- Sift the flour and baking powder together.
- Fold the flour into the batter gently.
- Avoid opening the oven door too early.
- Check the centre of the cake before removing it from the oven.
- Allow the sponge layers to cool completely before decorating.
- Use fresh baking powder for the best rise.
- Store leftover cake in an airtight container.
These steps may seem small, but they can help you achieve a more consistent result every time you bake.
Final Thoughts on This Classic Vanilla Sponge Cake Recipe
A classic vanilla sponge cake is one of those homemade desserts that never goes out of style. Its soft texture, gentle vanilla flavour and simple ingredients make it a wonderful choice for almost any occasion.
What I particularly love about this recipe is how easily you can adapt it. You can enjoy a plain slice with tea, add strawberry jam for a traditional afternoon treat or cover the sponge with buttercream for a beautiful birthday cake.
You do not need expensive equipment or advanced baking skills. You simply need the right ingredients, accurate measurements and a little patience.
If you are new to baking, start with this recipe and follow each step carefully. If you already enjoy making cakes, use it as a reliable base for experimenting with new fillings and decorations.
Most importantly, enjoy the process. A little flour on the kitchen counter and a mixing bowl that needs washing are small prices to pay for a delicious homemade cake.
So, preheat your oven, prepare your ingredients and give this classic vanilla sponge cake a try. It is a simple homemade treat that you’ll truly love!
I would also love to hear how your cake turns out. Did you enjoy it plain, add fresh strawberries or decorate it with vanilla buttercream? Share your favourite version and baking tips in the comments.
Classic Vanilla Sponge Cake Recipe
Ingredients
Equipment
Method
- Preheat the oven to 180°C (350°F) conventional or 160°C fan.
- Grease and line two 8-inch round cake tins with baking parchment.
- Sift the flour, baking powder and salt into a bowl. Set aside.
- Beat the softened butter and caster sugar together for 3–5 minutes until pale and fluffy.
- Add the eggs one at a time, beating well after each addition.
- Add the vanilla extract and mix briefly.
- Gradually fold the dry ingredients into the butter mixture until just combined.
- Add 3 tablespoons of milk and mix gently. Add the remaining tablespoon if the batter is too thick.
- Divide the batter evenly between the prepared cake tins.
- Smooth the tops and tap the tins gently on the counter to release large air pockets.
- Bake for 25–35 minutes, or until golden and a skewer inserted into the centre comes out clean.
- Remove from the oven and allow the cakes to cool in their tins for 10 minutes.
- Transfer the cakes to a cooling rack and allow them to cool completely.
- Dust with icing sugar or decorate with your favourite buttercream, jam or fresh fruit.
Notes
– Avoid overmixing after adding the flour.
– Check the cakes after 25 minutes because oven temperatures can vary.
– Allow the sponge layers to cool completely before decorating.
– Store plain cake in an airtight container at room temperature for 2–3 days.
– Freeze wrapped, undecorated sponge layers for up to 2–3 months for the best quality.